EEP - Making Your First Sky Tutorial

We will all be using EEP eventually so learning more about it might well be on your ToDo list for the new year. Hopefully this step by step will help some. The Linden viewer will be used for this tutorial as I want to have a firm footing on the ins and outs of our new environmental maker before I download the new EEP Firestorm.
******************
A caveat here and an important one. You WILL lose your personally made Windlight settings when you move from a Windlight viewer to an EEP viewer so it is very important to copy out your "skies" folder and make a backup somewhere else on your drive -- or if you only have a few that you want to save, just copy them over to a new and safe spot that will not be written over.
Here is the path for mine; hopefully yours is similar.
******************
First you need to make a New Sky and get to the pane where you can make some changes.
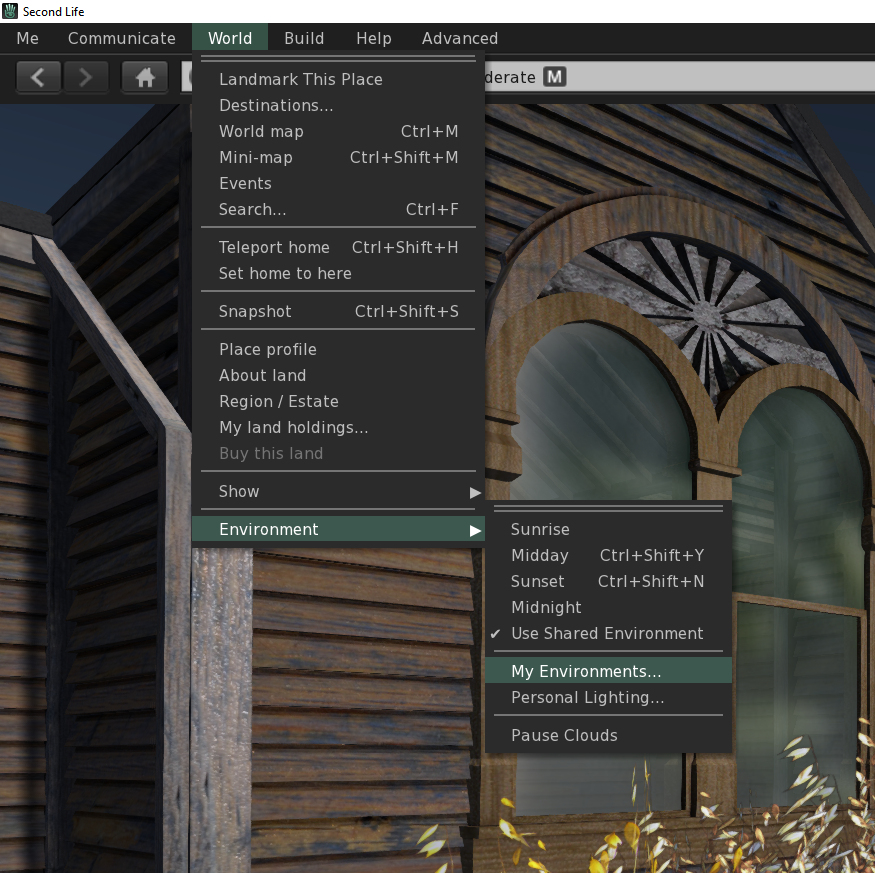
World > Environment > My Environments will take you to ...

the My Environments pane where you click on the "+" sign to make a new sky setting.

Double click on your "new sky" to open this new pane with choices for creating your new sky. It also changes the sky to a default blue sky around noon.

If you have made Windlight skies then some of these terms will be familiar to you. Let's compare the EEP pane to the previous Windlight version.

As we compare the two interfaces, we can see that most of the possibly familiar terms are on this pane but the sun-moon color is missing. And we have a few NEW settings to play with such as droplet radius, ice level and maximum altitude. The sun, moon and stars have moved to their own tab. Let's go ahead and change some settings.

But before we start making our own new sky, it is important to be able to see the horizon. So let's switch the view a bit.
This is the very same default noon sky but with the BLUE DENSITY changed to a darker and less saturated (more gray) blue. It already looks much different than the default starting sky.

To make this change, first click in the Blue Density color area (left arrow) , then choose a color from the color picker OR click in the rainbow area of the screen (the middle red arrow). When you have chosen the new color for your sky, then you can choose the darkness of that color in the right hand VALUE panel (right arrow).
Next, let's make the Blue Horizon darker -- no change in the hue, just in the value.

In this case and with this choice of color we are lowering the saturation (grayness) of the scene. Even though "horizon" is the designation of this color choice, the color and intensity and value of the swatch affects the total sky. So we only need to pick a darker tone on the right hand VALUE bar (clicking lower on the panel).
Last step for the three color swatches:
Choose a color for the AMBIENT lighting, this is the general atmospheric hue in the air so to speak -- the general natural light.

In this case I chose a warm brown color in order to warm up the rocks and give them a more natural look. Notice that while the sky changed a bit also, the biggest difference that you see is on the rocks and the distant horizon -- and eventually in the clouds as they reflect the ambient color.
When you are working on your own sky you will likely want to play around with these three swatch areas in order to get the basis for your sky. Making EEP skies -- just like making Windlight ones often includes a back and forth dance of choices to get the effect you are after.

The HAZE and DENSITY settings work together to give you the effect that you want on the horizon (or in the distance if you cannot actually see a horizon). This is for fine tuning and you will most likely only want to change these settings by small margins. The density multiplier is the slider that lets the horizon disappear into the sky. In this shot only the haze density and density multiplier have been changed. You can compare this version to previous numbers to see the changes. The distance multiplier works in a similar manner to the density multiplier.
You can use either the sliders or type numbers into the settings areas.
Maximum altitude changes both value and saturation of your sky. There is no real reason to make changes in ALL the designations; sometimes the defaults work well as they are. I can't see any changes in this sky for Droplet Radius or Ice Level, but Scene Gamma is the general brightness of your sky, an inclusive way to brighten or dim your scene uniformly.
The Cloud tab allows you to make extensive changes to the clouds in your sky as well as change the cloud texture. There is an alternate cloud texture in the viewer inventory or you can upload your own.


The sun, moon and stars are now in their own pane. You can adjust the direction of the lighting by dragging the "dot" around the globe. Add stars to your sky if you choose and even upload your own sun texture. Currently (end of December 2020) the moon isn't working correctly, so if you want a moon in your night sky then the general advice is to use the sun for now. I haven't tried this and seldom want a sun or moon in my photos so not a deal-breaker for me :D.

When your new sky is to your liking, save it with an appropriate name.
You can add a sun graphic from the library or upload your own. You will then have a backlit shot (see lead photo). Move the dot on the globe downward to get the sun into your photo plane.
Both of these skies have been added to the free EEP sky settings on the wall here.
And for those of you still wondering about Droplet Radius and Ice Level, here is the answer that I received from the forums.


Comments