Outfit Thumbnails in Second Life

But 2020 brings a new type of game in my world. Money comes in and never goes out. So, with a ton of extra lindens at hand I decide that 2020 would be the year to make my virtual closet a more pleasingly pretty place. For those of you that need a help with the process, here are the steps and some tips.
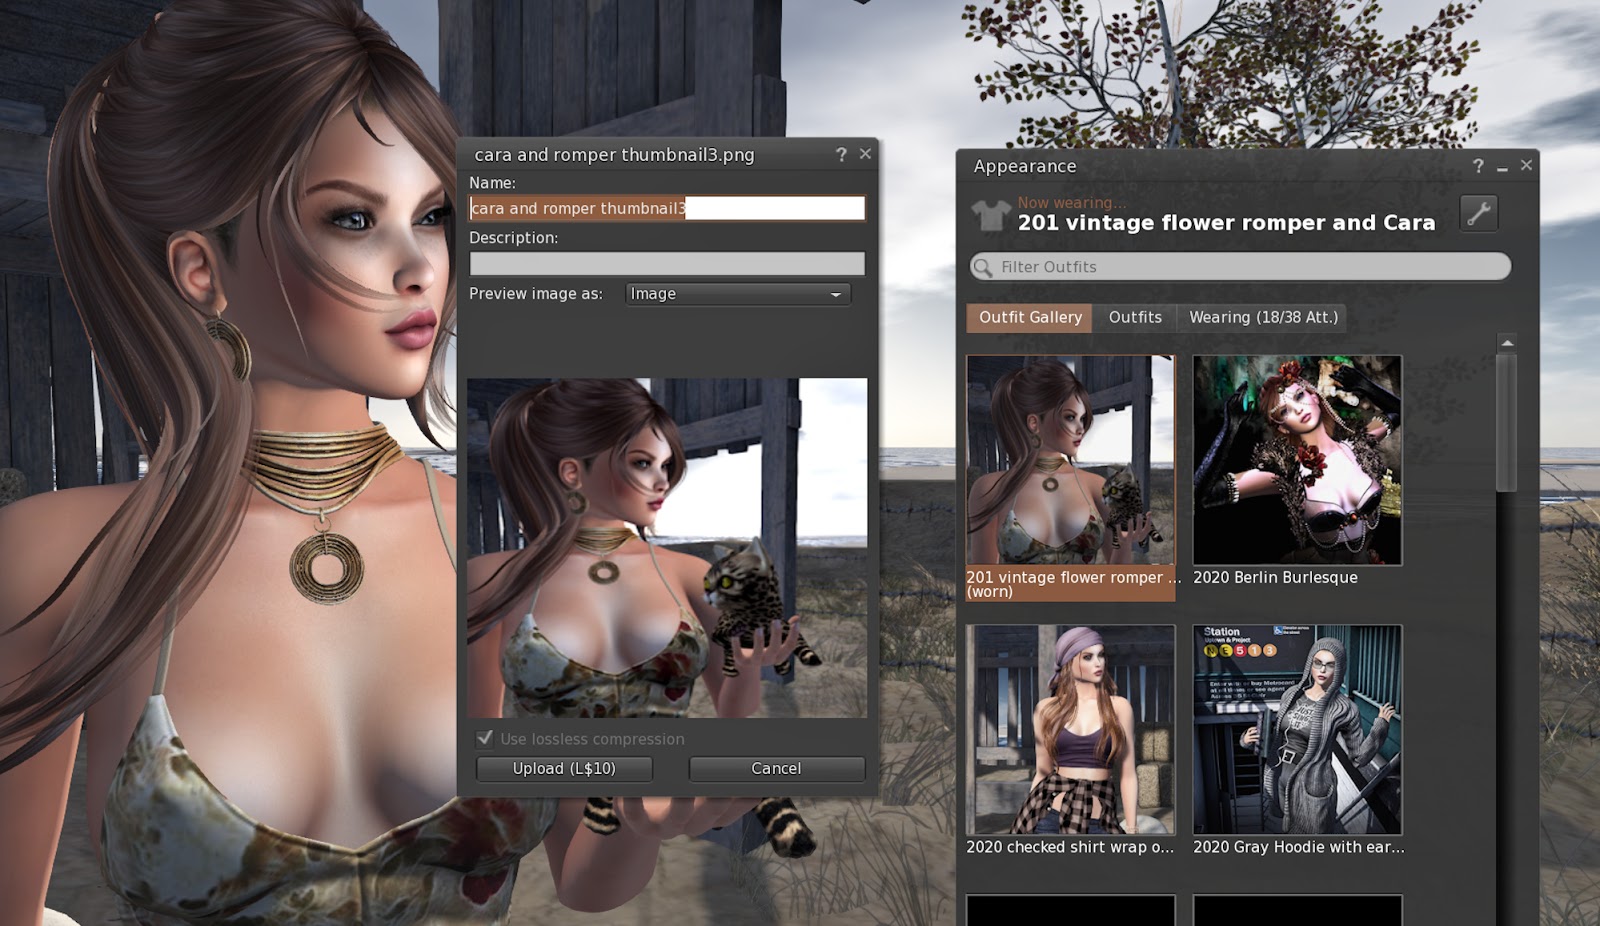
There are a few methods you can use to add your thumbnails. If you are a blogger you likely already have a great looking photo of your outfit. Typically that is what I have been using for my newer "favs".
Your blog photo will need to be cropped and definitely resized. 256 x 256 is the ONLY size you can use in your thumbnail slots. Once you have your thumbnail made from the larger photo it is a simple process of uploading and using that in place of the default folder with hanger icon. You cannot use local textures to test the look unfortunately, but some practice will let understand what you want in your thumbnail.
Here are some step by steps:
The simplest way it to just take a photo THROUGH the outfit pane.

Right click on the outfit icon (with hanger still ) that you are wearing. Choose Take a Photo. One click and you are mostly done, you simply have to OK your shot and the image appears magically to describe your outfit --- but
Remember how tiny this photo will be? You don't really want background in the shot; you want enough of the outfit UP CLOSE so that you can be sure you are selecting your outfit of choice.
The screenshot above would be the typical default photo of your avatar and outfit. Too much barn, not enough outfit.

Happily the "take a photo" option isn't automatic and you DO have the ability to try again. You need to close the snapshot pane however before using the "take a snapshot" option for a retake.
In this example the shot (which of course looks much larger than the 256 version) was too dark when used.
So I brightened the photo in my graphics software and uploaded -- this time using the upload in the BUILD menu. Then I used the SELECT PHOTO option to replace the dark photo with the brighter one.
It really IS nice to be able to see the visual representations rather than just the descriptive phrases!
It is also a fun project as long as you take your time and enjoy the process.
Poses by: Vista Animations AO


Comments